Building a Static Site in Your iPad
A Step by Step Guide on Creating a Nextein Site with Play.JS.
Jul 23, 2020 · 3 min read
There was some hype out there about using your iPad Pro as a replacement for your development computer. If that is doable we'll see in a not so far away future. For now, we can use our iPad Pro along with Play.js to act as our IDE, or JavaScript IDE, to create a Nextein Site.
If you don't know what Play.js is, it is an awesome JavaScript IDE for iOS.
Long story short, I've read a tweet from Guillermo Rauch about modifying a Next.js site in his iPad using Play.js. A few minutes later, I found myself installing the IDE and creating a new project to give it a try. Almost from scratch, setting one or two things here and there and boom. Hit run and see the site running on the side.
I spent the next few minutes trying to create a Nextein Site. Then realizing I have a small bug to fix. Switch to my computer, fix, publish beta. Test. Repeat. Done. (Ok. Maybe a few more cycles were required.)
Let’s Create a Site
First thing first, install Play.js in your iPad. Yes. It’s USD 4.99 - (almost half of that over hyped email service you paid monthly.)
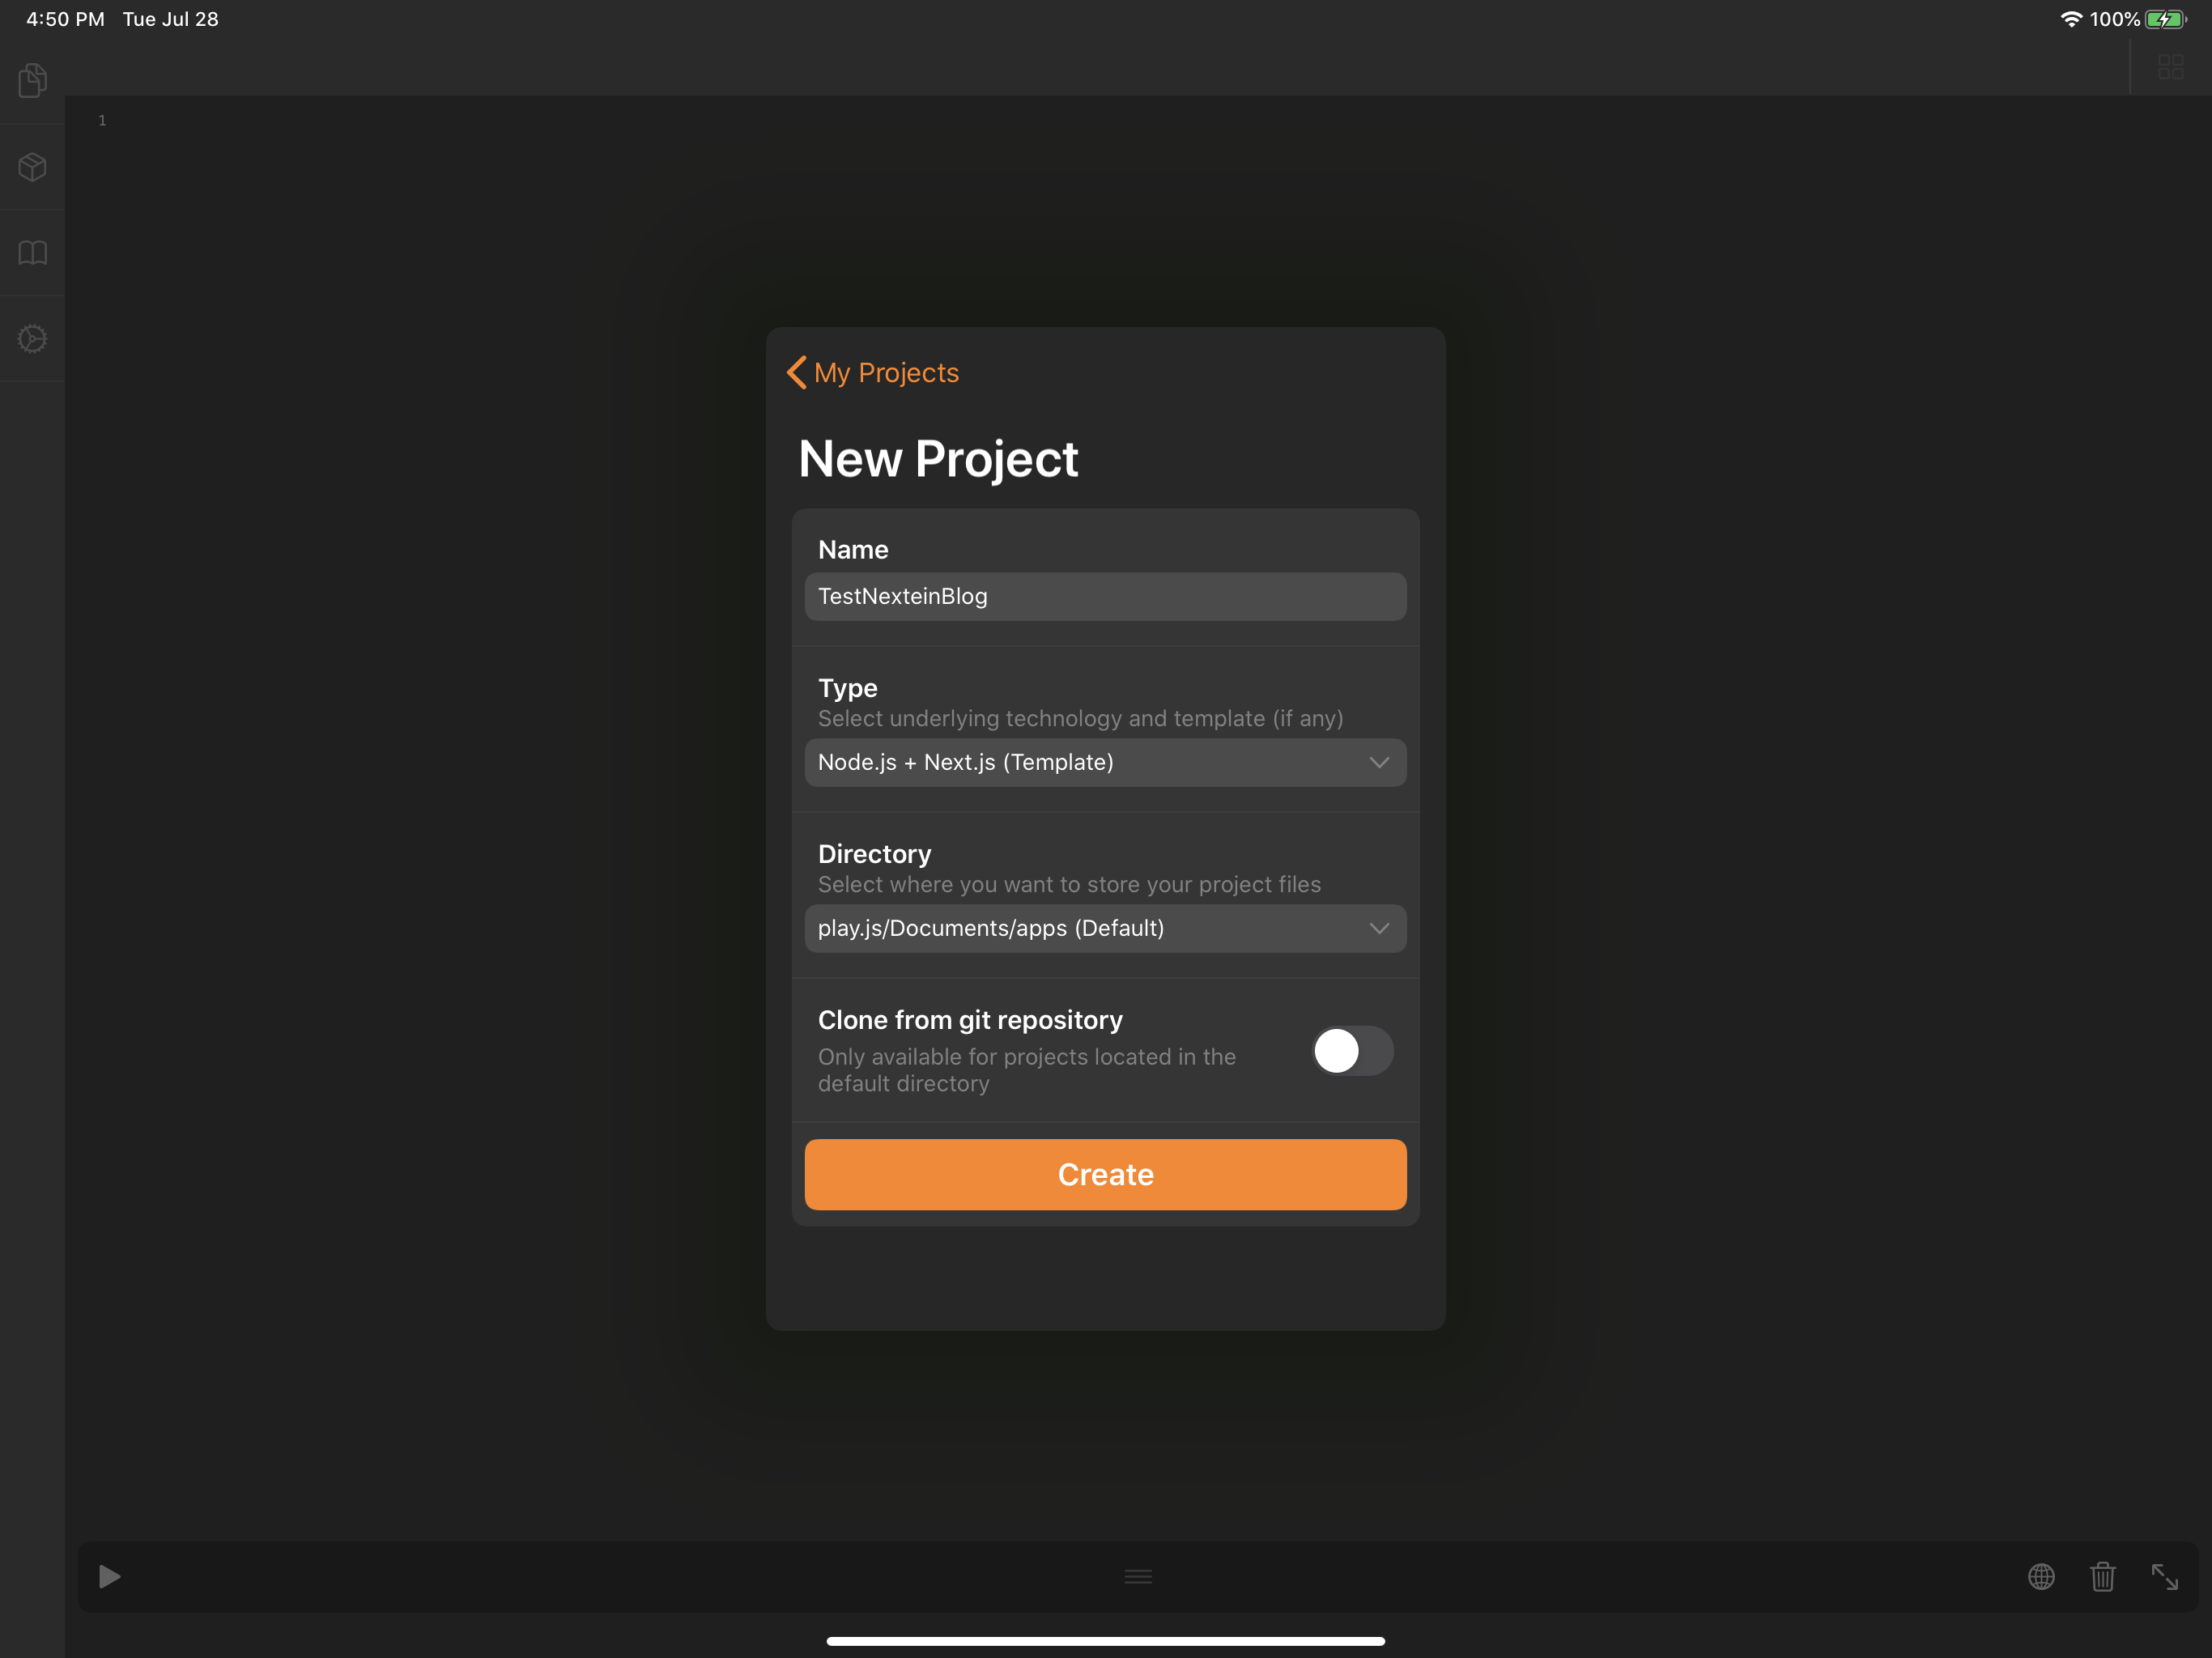
Now, let's create a new project. Give it a name. For the type we can select a plain Node.js project or a Node.js + Next.js template. Let’s use the latter so we create less files. And finally where to save it. I’d try to get everything in my iPad.
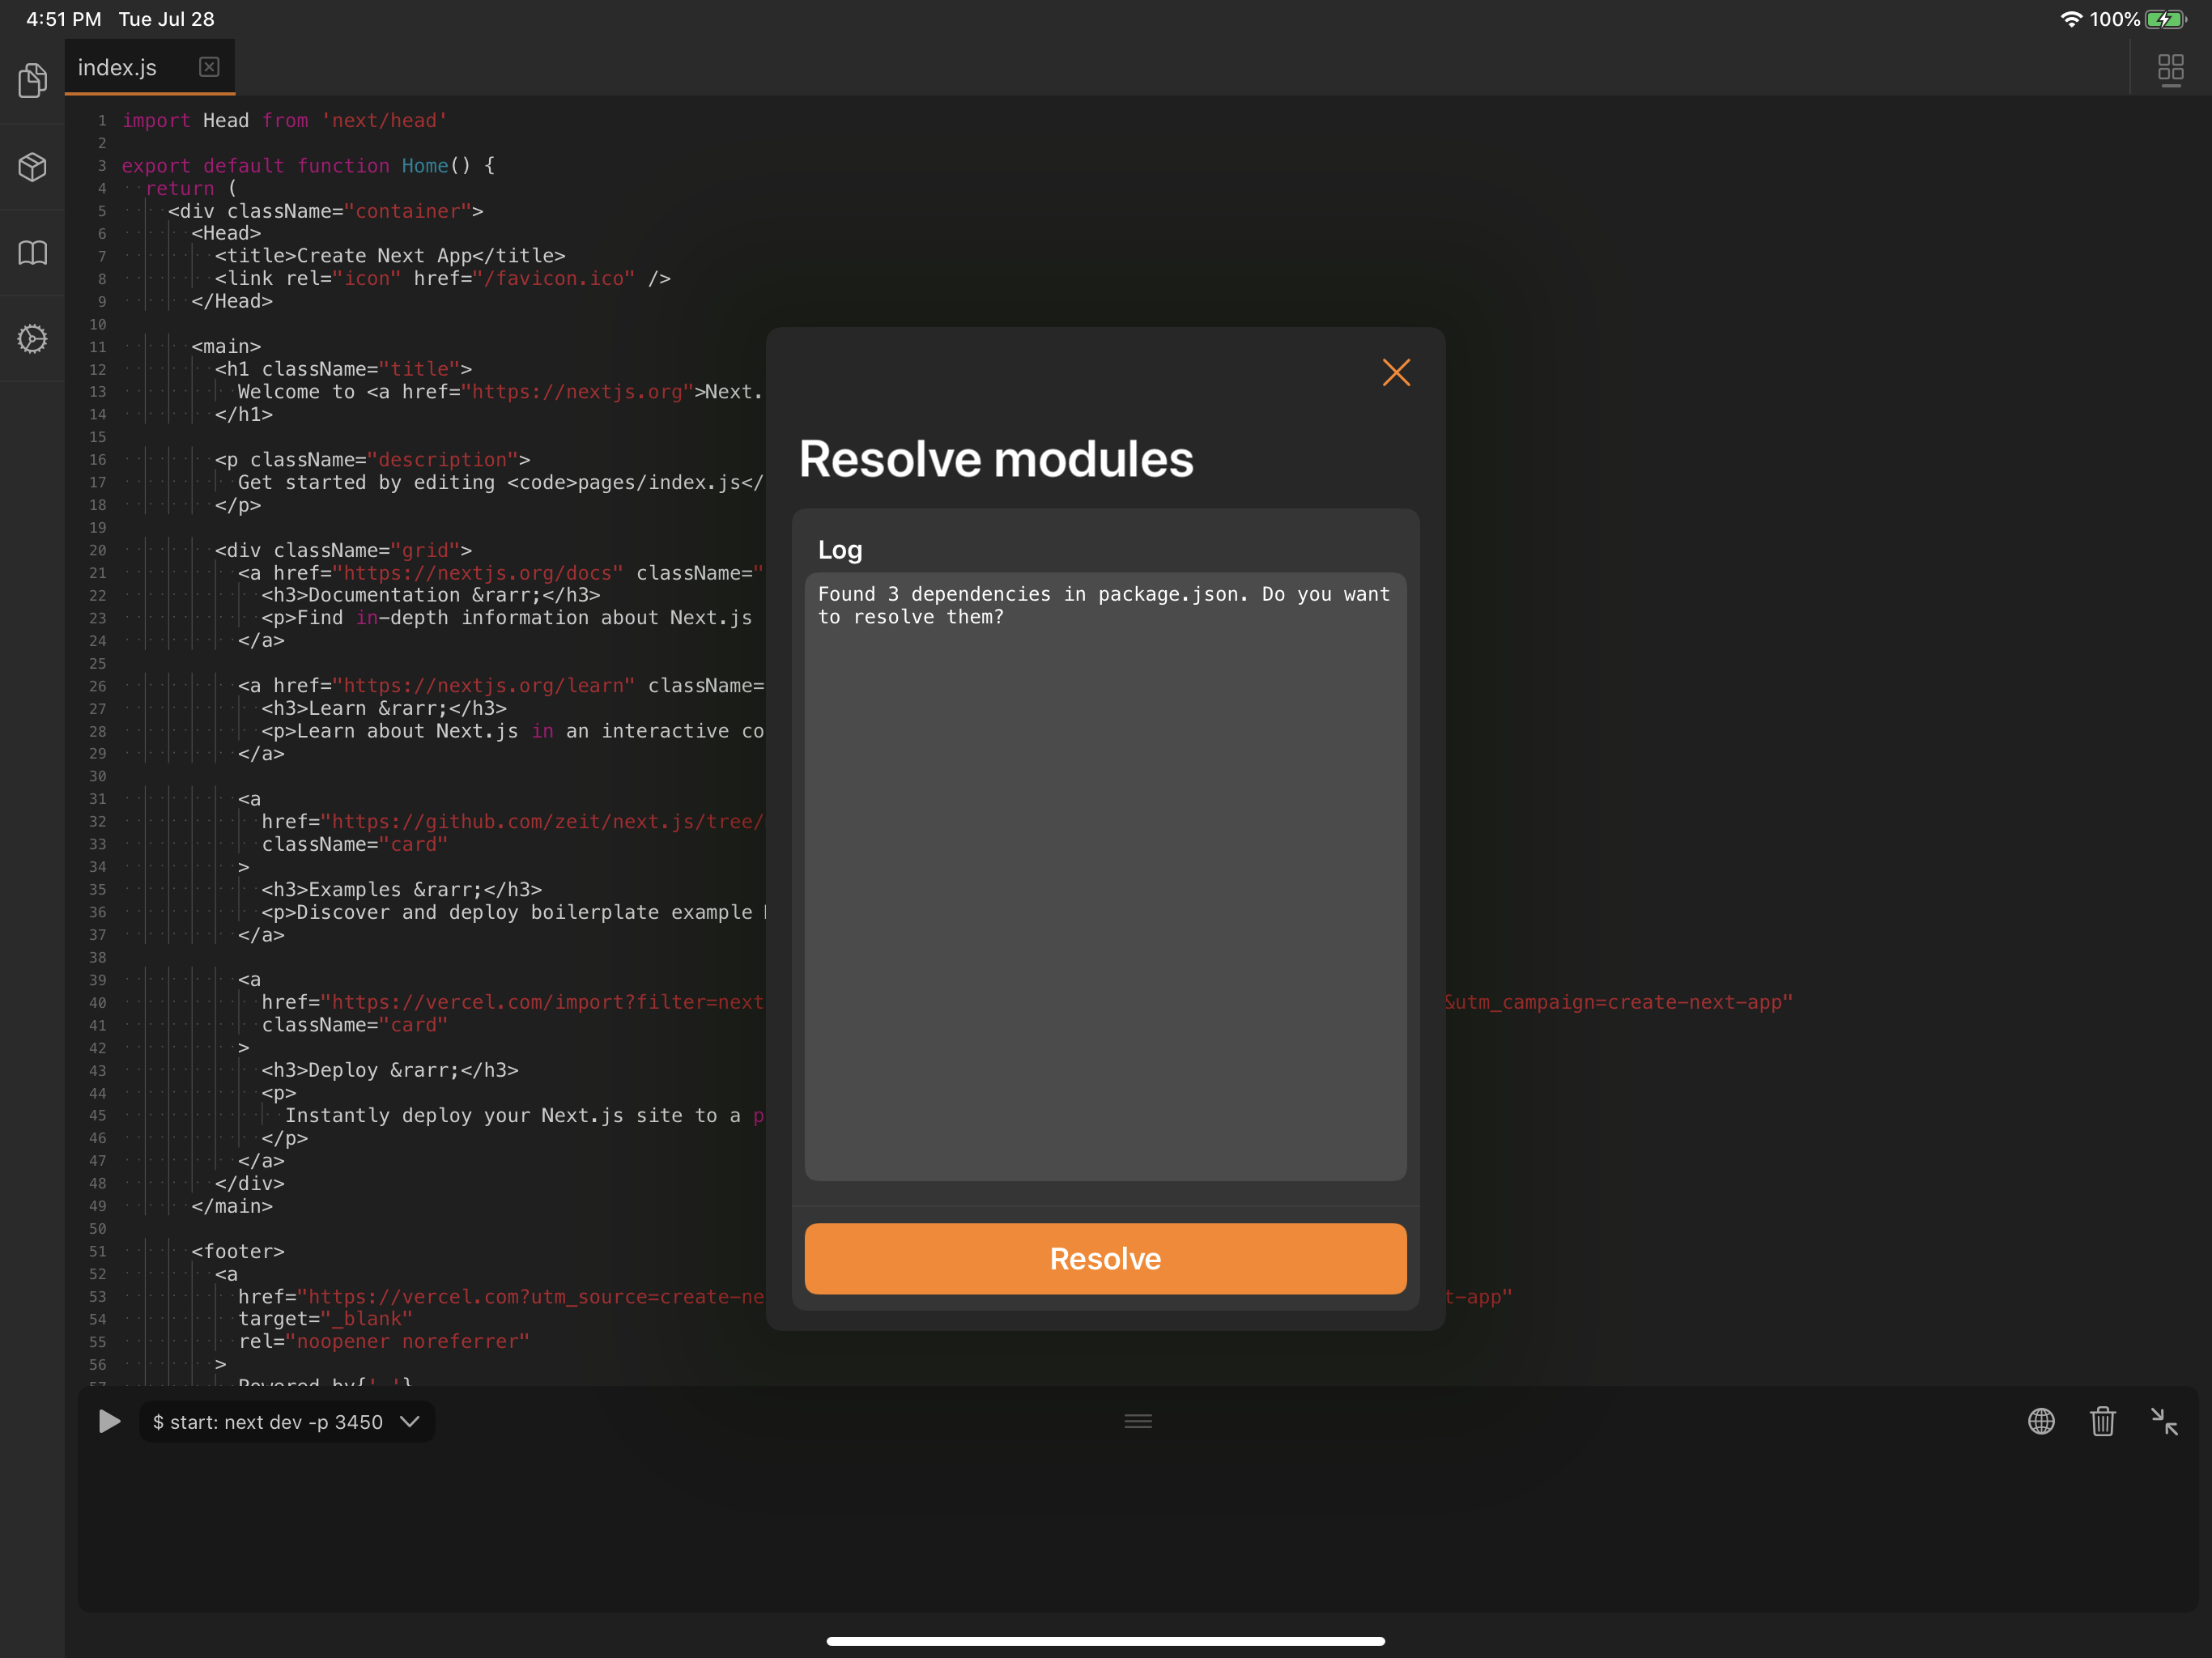
If you click on the little Play button on the bottom of the screen you will be presented with a modal asking to resolve modules. Don't worry that's the npm install (sort of) stage. So go ahead, and tap on resolve
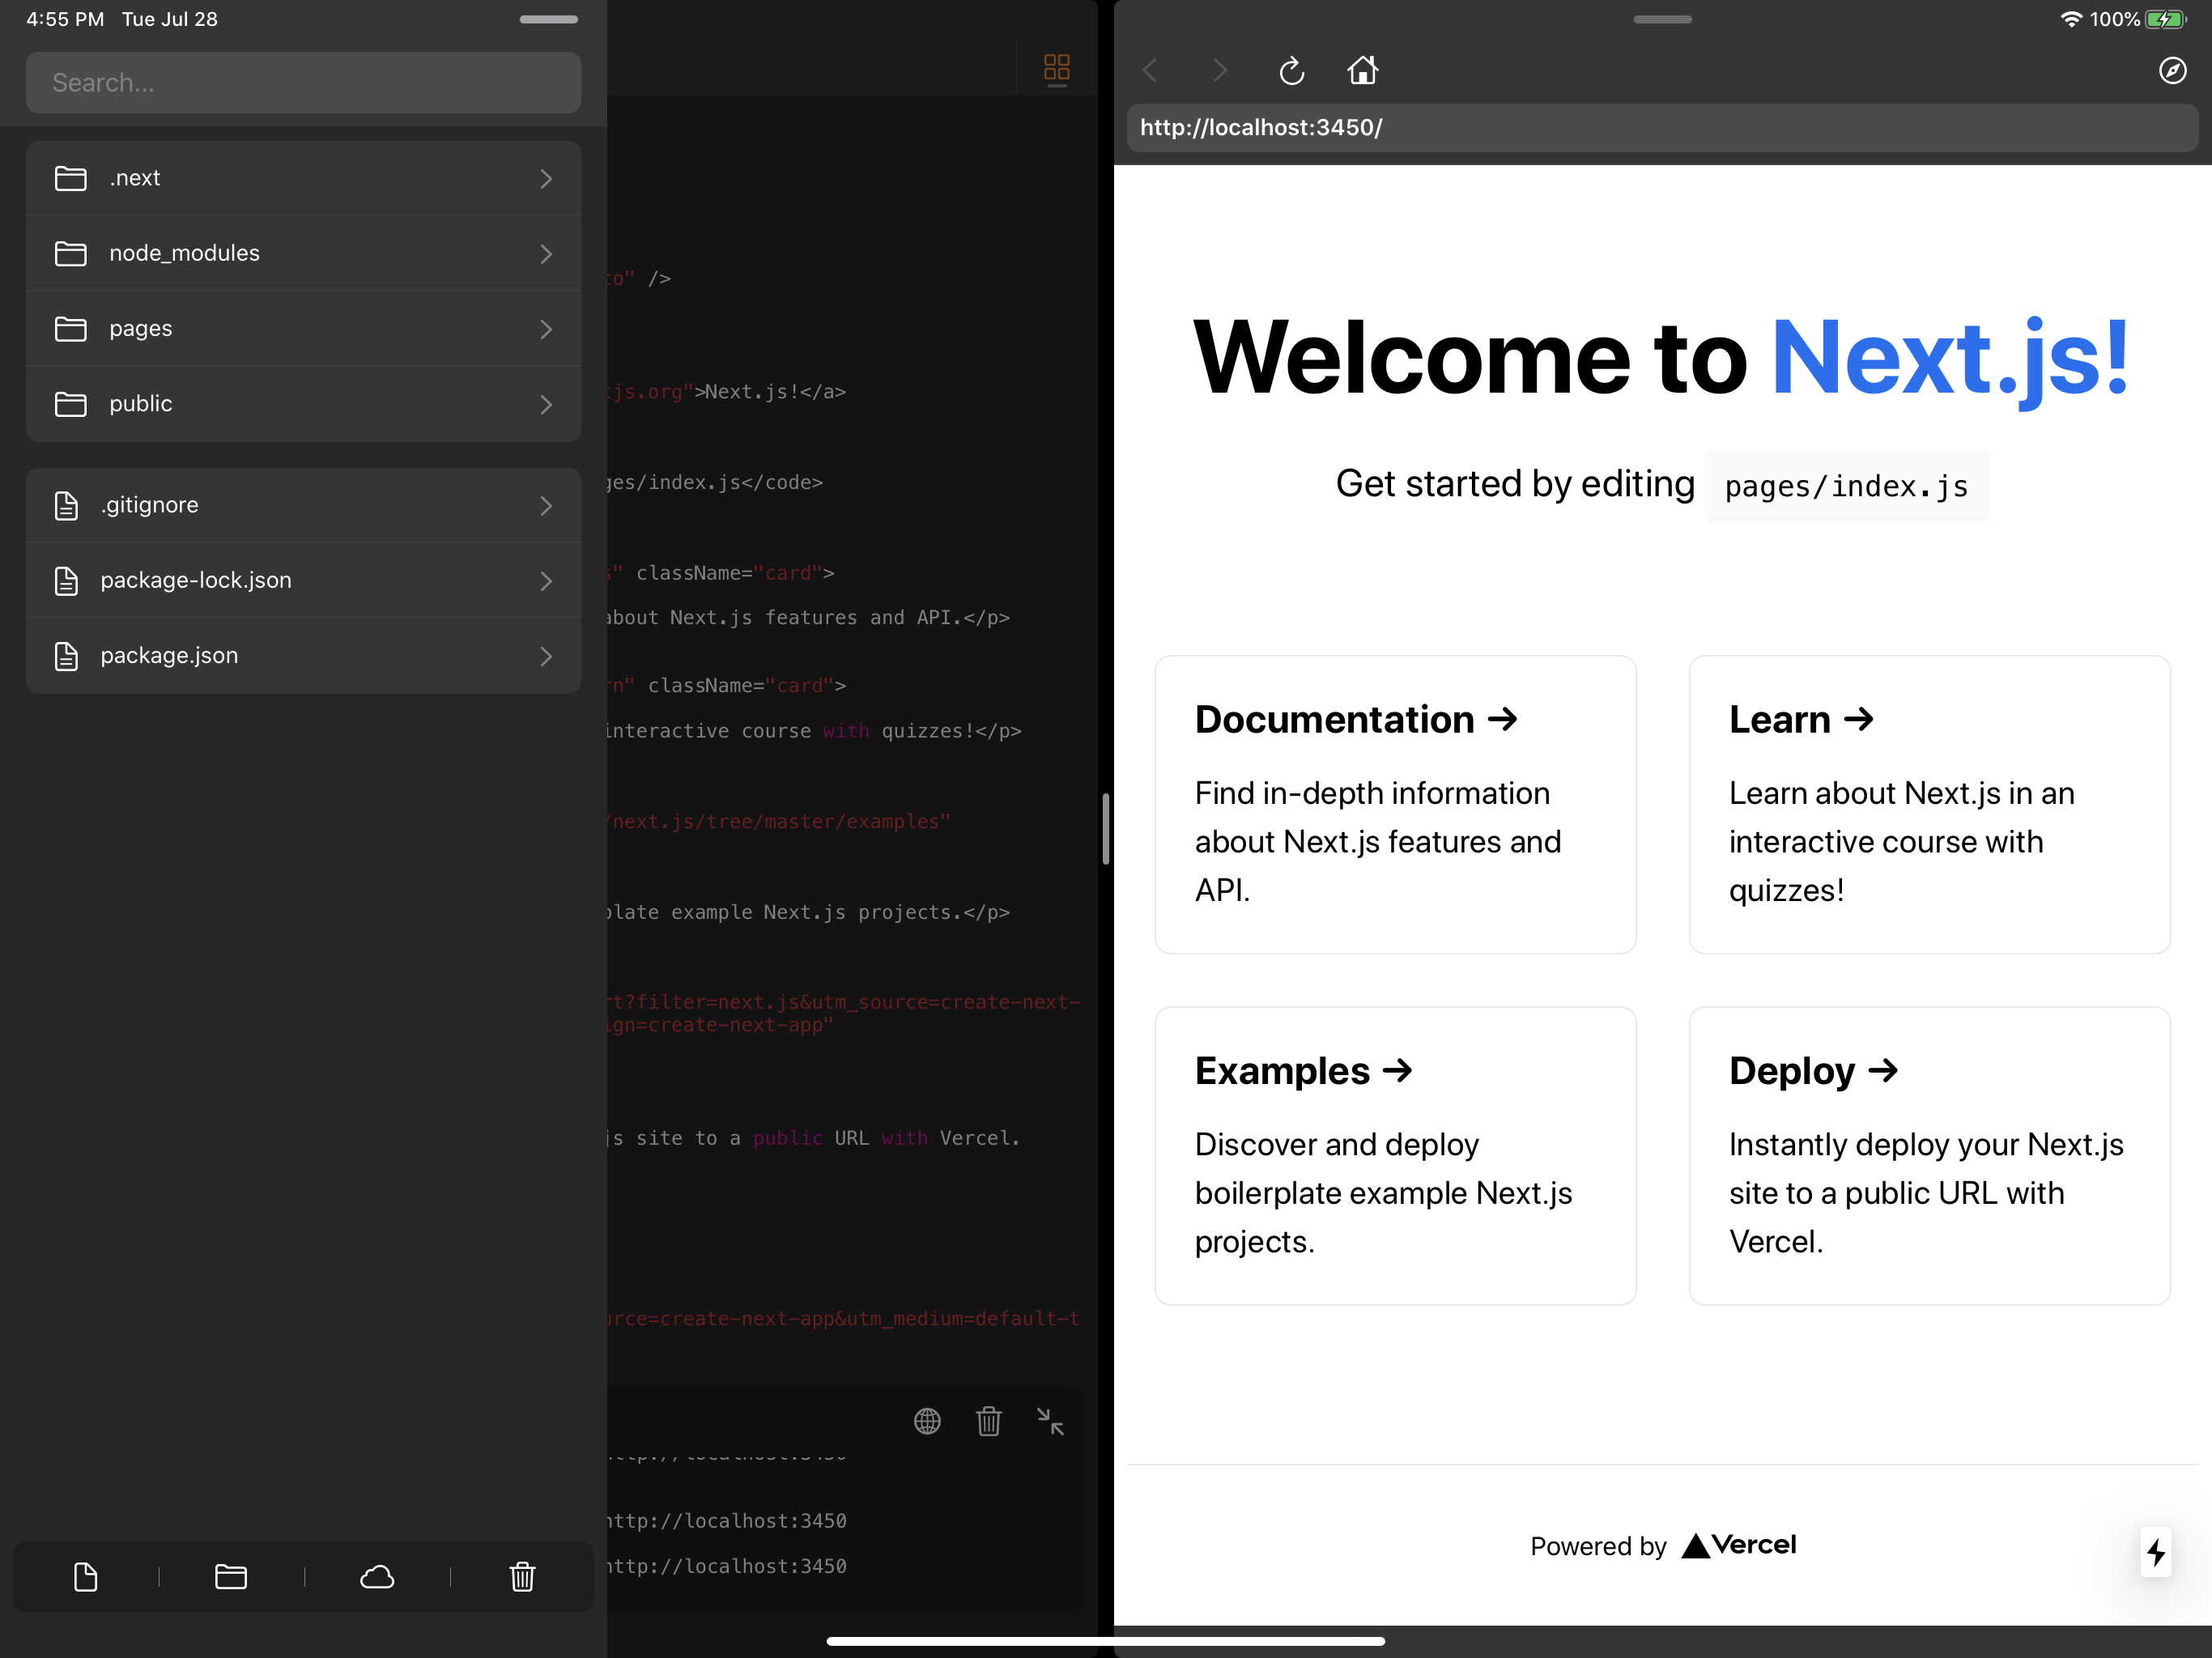
If all goes smoothly, you can tap on the Globe icon in the bottom toolbar and it will open a browser window by the side. You are now able to run play with your first Next.js site in your iPad Pro. Magical, isn't it?
Starting with Nextein
Tap on the side toolbar to explore files and folders. Select package.json. We are going to add Nextein as a dependency and add the run dev script.
I modified the start script (I like to name it dev) and added the dependency. My package.json now looks like this:
{
  "entry_script": "dev",
  "entry_file": "pages/index.js",
  "scripts": {
    "dev": "nextein dev -p 3450"
  },
  "dependencies": {
    "next": "9.3.5",
    "nextein": "2.7.0",
    "react": "16.13.1",
    "react-dom": "16.13.1"
  }
The next step is to create a config file next.config.js and make use the withNextein configuration:
const { withNextein } = require('nextein/config')

module.exports = withNextein()
Almost there, let's modify pages/index.js to include all posts.
Add the imports for withPosts and Content components:
import withPosts from 'nextein/posts'
import Content from 'nextein/content'
Using withPosts HOC, we can wrap our Home function to be able to read our posts:
export default withPosts(function Home({ posts }) {

   // Scroll to grid div somewhere in the Home main tag. Let's add our posts
	{
            posts.map(post =>(
              <div key={post.data.url} className="card">
                <h3>{post.data.title}</h3>
                <Content {...post} excerpt />
              </div>
            ))
        }

})
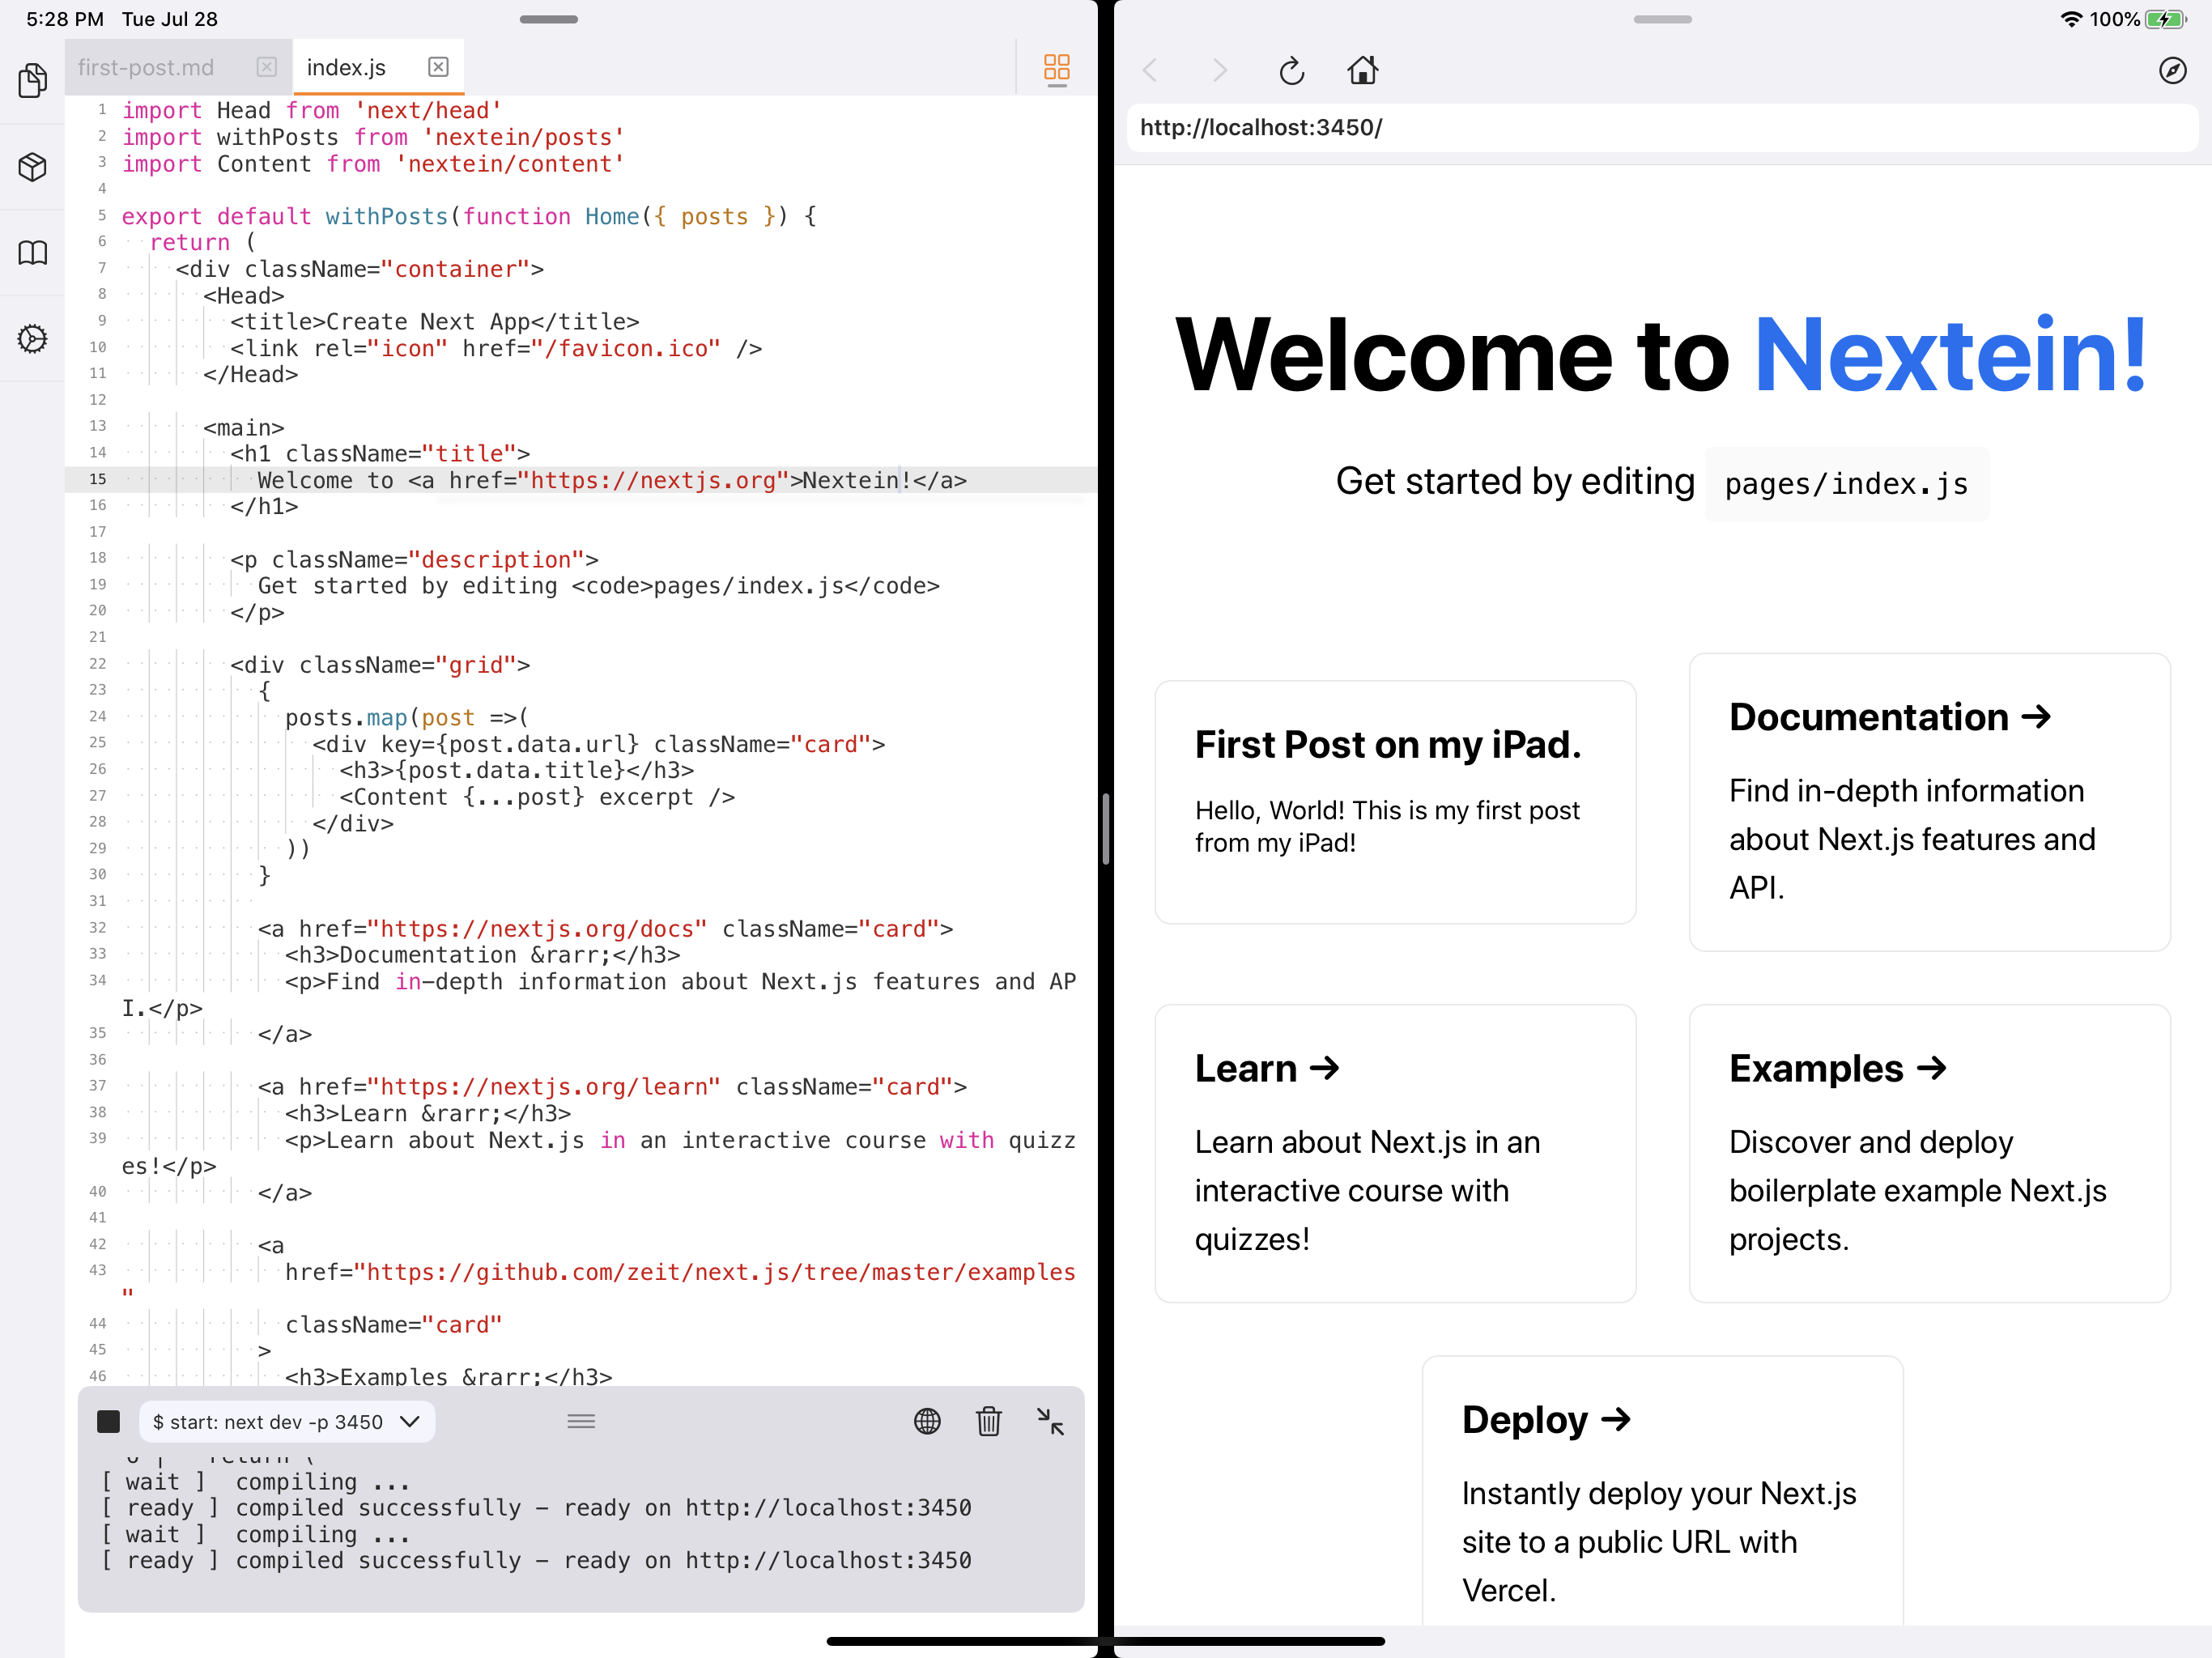
Ok, page ready, now let's create our first post entry. Add a posts folder and create a first-post.md file with the following content:
---
title: First Post on my iPad.
---

Hello, World! This is my first post from my iPad!
And after you click back on the play button, resolve dependencies again, and open the side browser, your first Nextein Site is up and running.
Now enjoy modifying your Home page, or adding more posts!